 Skip to content
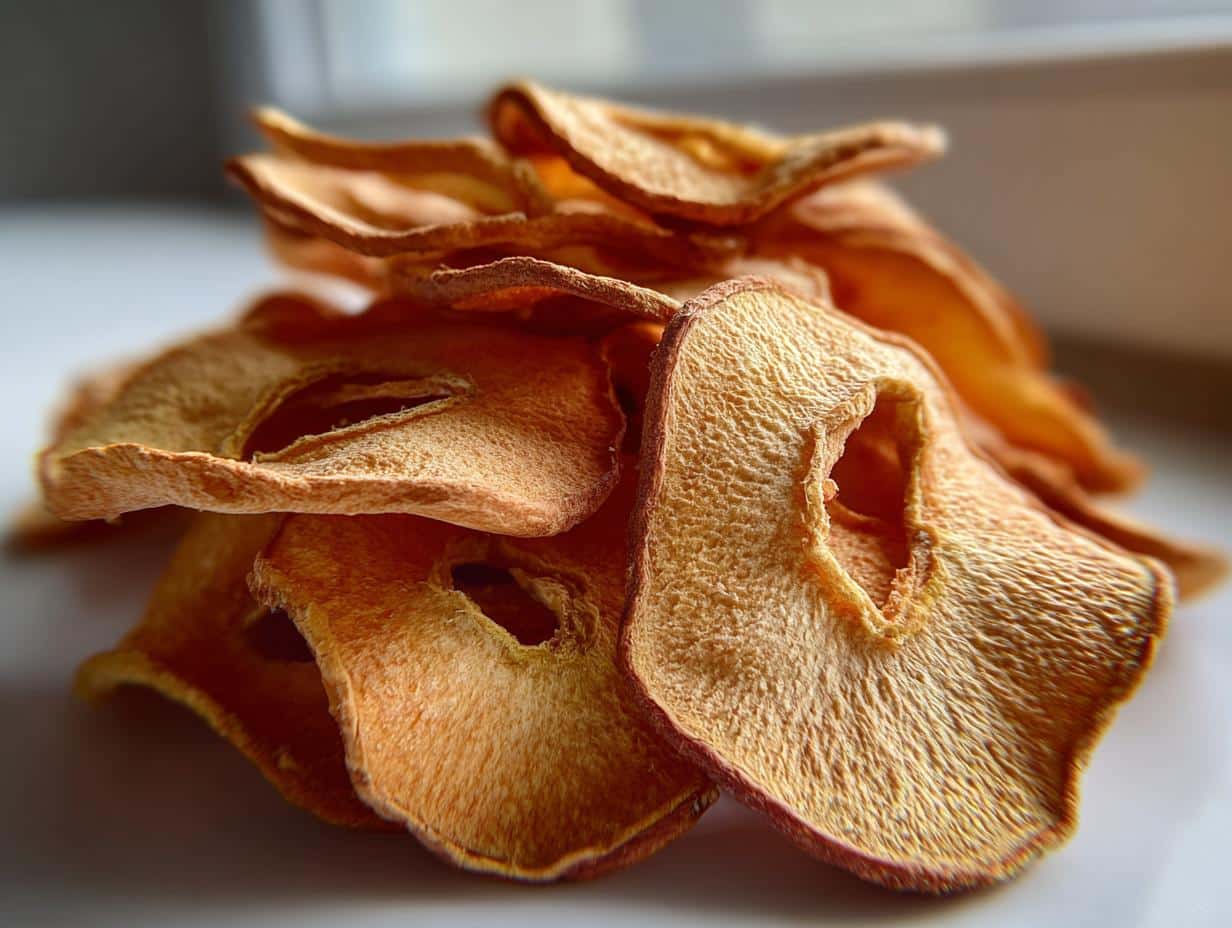
There’s something so incredibly satisfying about making your own dehydrated apples. I remember the first time I tried it, I was blown away by how simple it was and how amazing they smelled filling my kitchen! It’s honestly one of my favorite ways to keep that fresh apple flavor around long after apple season is over. Plus, knowing exactly what goes into them – just pure, simple apples – makes them such a fantastic healthy snack option. It feels like a little bit of magic, turning fresh fruit into these chewy, sweet little treasures that are just bursting with flavor. You’re going to love how easy this is!

Why You'll Love Making Dehydrated Apples
Seriously, making your own dried apples is a game-changer! Forget those pricey store-bought versions. This recipe is all about bringing you the best of homemade goodness.
A Wholesome and Delicious Treat
These aren’t just any dried apples; they’re pure, unadulterated apple goodness! You get all that natural sweetness without any weird additives. They’re such a fantastic healthy apple snack option, perfect for anyone watching their sugar intake or just wanting to eat cleaner.
Perfect for Snacking and Baking
Once you’ve mastered this DIY dried apples recipe, you’ll find yourself reaching for them constantly. They’re amazing straight from the container for a quick energy boost. But they also work wonders chopped up in your morning oatmeal, tossed into a trail mix, or even added to your favorite muffin or cookie recipes for a burst of apple flavor! You can find more cookie dough recipes that pair well with these.
Simple and Rewarding DIY Process
The best part? It’s ridiculously easy! You basically just slice, arrange, and let the dehydrator do its thing. It’s a super rewarding way to preserve fruit yourself. You’ll feel like a kitchen magician turning fresh apples into these delightful, long-lasting treats!
Essential Ingredients for Perfect Dehydrated Apples
Alright, let’s talk about what you’ll need to make these amazing dehydrated apples. It’s honestly super simple, which is part of why I love this recipe so much! You don’t need a fancy pantry for this one.
Choosing the Best Apples for Drying
When you’re picking out your apples, you want to go for ones that are firm and ripe. My personal favorites for drying are Fuji, Gala, or Honeycrisp. They have just the right amount of sweetness and a nice, firm texture that holds up really well during the dehydrating process. You want apples that aren’t mushy, because those can get a bit… well, weird, when you dry them. Basically, pick apples you’d love to eat fresh! These varieties are often called the best apples for drying because they have a great balance of flavor and firmness.
The Role of Lemon Juice (Optional)
Now, this next part is totally optional, but I usually toss my apple slices with just a *tiny* bit of lemon juice. It’s mostly to help prevent them from turning brown and looking sad while they’re drying. It doesn’t really change the taste, and it makes for prettier slices! If you don’t have lemon juice, a little bit of pineapple juice can work in a pinch, or you can just skip it if you don’t mind a slightly browner apple.
How to Prepare Dehydrated Apples Step-by-Step
Alright, let’s get down to business and make some amazing dehydrated apples! This is where the magic really happens, and trust me, it’s super straightforward. You’ll have these delicious, chewy apple slices before you know it. The whole process, from prepping to having them ready to store, takes about 20 minutes of your hands-on time, and then the dehydrator does the rest for 6 to 10 hours. It’s totally worth the wait!
Preparing Your Apples
First things first, give your apples a good wash. Make sure they’re nice and clean! Then, you’ll want to core them. You can use an apple corer if you have one, or just cut around the core. The most important part here is slicing them evenly. I aim for about 1/8 to 1/4 inch thick slices. Why is this so crucial? Because if your slices are all different thicknesses, some will dry out way faster than others, and you’ll end up with a mix of crispy and chewy bits. Uniformity is key for perfect dehydrated apples!
Arranging for Optimal Dehydration
Once your apples are sliced, if you used the lemon juice trick, give them a quick toss in a bowl. Now, grab your dehydrator trays. You want to lay the apple slices out in a single layer. Seriously, make sure they aren’t piled up or touching too much. They need space for the air to circulate all around them. If they’re overlapping, they won’t dry evenly, and you might even get some moldy spots, which is a total bummer. So, take your time and spread them out nicely – think of it as giving each apple slice its own little sunbathing spot!
The Dehydrating Process
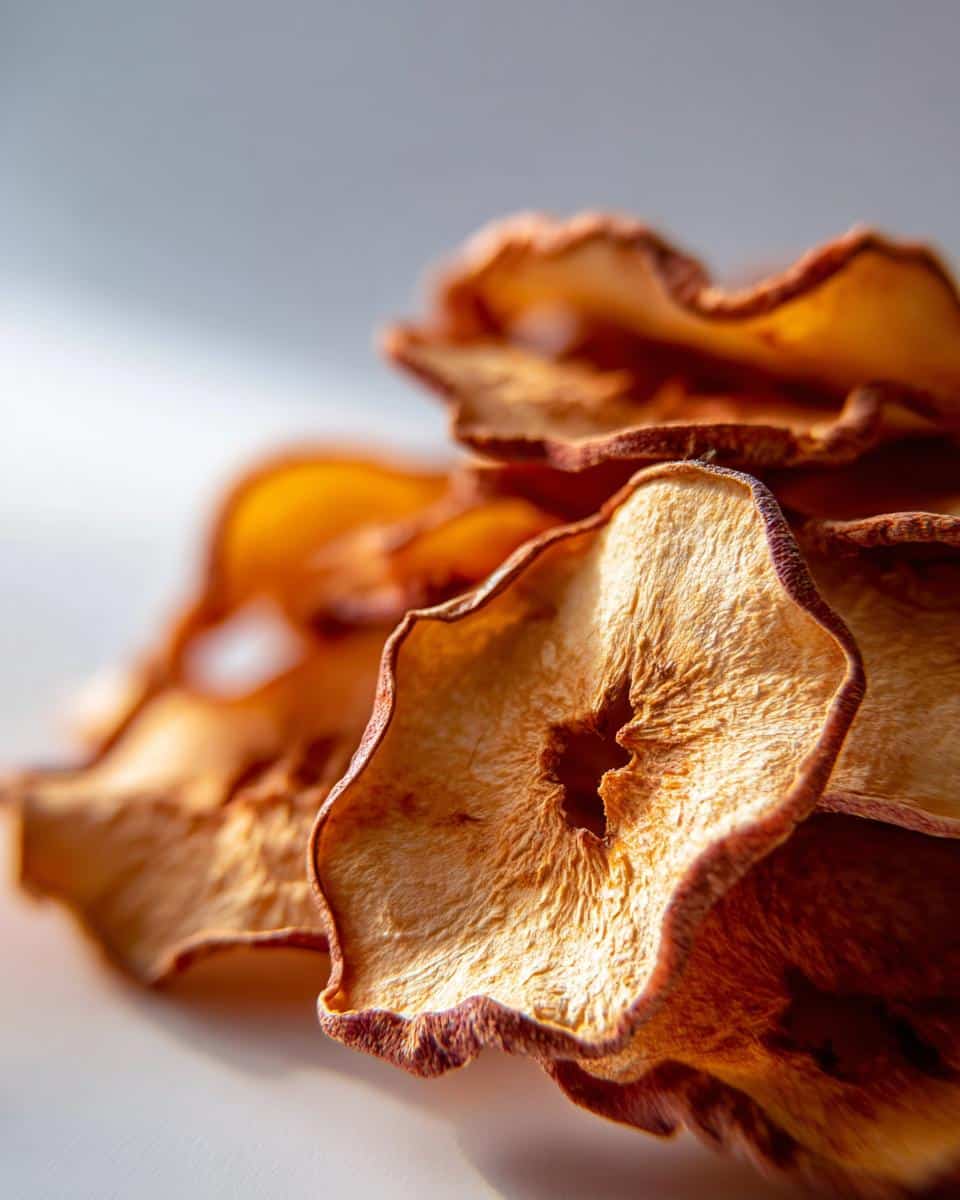
Now for the waiting game! Set your dehydrator to 135°F (57°C). This is the sweet spot for drying fruit perfectly. Pop those trays in and let them work their magic. The time can vary quite a bit, usually between 6 to 10 hours, depending on how thick your slices are and how humid it is in your kitchen. How do you know when they’re done? You’re looking for a leathery, pliable texture. They should be bendy but not mushy, and definitely not brittle or crispy. A good test is to take a slice, let it cool for a minute (it gets a bit firmer as it cools), and then give it a good bend. If it bends without breaking, it’s perfect! If it snaps, it’s overdone. If it’s still super soft and moist, give it a bit more time. Once they’re done, let them cool completely on the trays before you store them. This step is super important for preventing condensation in your storage containers later.
Tips for Dehydrated Apple Success
Okay, so you’ve gone through the steps and made your gorgeous dehydrated apples! High five! Now, let’s make sure they turn out absolutely perfect every single time. A few little tricks can make all the difference between good and *amazing*.
Achieving the Perfect Texture
Remember how we talked about checking for that leathery, pliable texture? That’s usually the goal for snacking. But hey, maybe you want something a little different! If you’re aiming for more of a crispy apple chips homemade vibe, you can just leave them in the dehydrator a bit longer, or even lower the temperature slightly for the last hour or two. Just keep a close eye on them so they don’t burn! On the flip side, if you accidentally over-dry them and they’re too brittle, don’t panic! You can often rehydrate them slightly by tossing them in a sealed bag with a damp paper towel for a few hours. It’s all about finding your perfect chew!
Proper Storage for Longevity
This is HUGE for preserving apples naturally. Once your apple slices are completely cool – and I mean *completely* cool – you need to get them into an airtight container. Jars with tight-fitting lids are my go-to. If you store them while they’re still warm, any condensation that forms can make them go moldy super fast. Store them in a cool, dark place, like your pantry. Properly stored, these little gems can last for several months, which is pretty incredible! You can learn more about preserving herbs which is a similar process.
Troubleshooting Common Issues
The most common issue is uneven drying, which usually happens if your slices weren’t uniform or if they were overlapping on the trays. Next time, just focus on those thinner, even slices and making sure there’s space between each one. If you notice any mold, sadly, you have to toss that batch because it means they weren’t dried enough or stored properly. It’s a bummer, but it’s a good lesson for your next batch! Always make sure they feel dry to the touch before sealing them up.
Creative Ways to Enjoy Your Dehydrated Apples
Okay, so you’ve made a big batch of these amazing dehydrated apples, and now you’re wondering what to do with them besides just munching them straight from the jar (which, let’s be honest, is totally a valid option!). Trust me, these little flavor bombs are way more versatile than you might think. They’re perfect for so many apple snack ideas and even some creative cooking!
Dehydrated Apples as Healthy Snacks
This is probably the most obvious use, and for good reason! They are just the ultimate grab-and-go snack. Packed with natural sweetness and fiber, they give you a great energy boost without any of the junk you find in processed snacks. I love tossing a handful into my gym bag or keeping a baggie on my desk for those afternoon slumps. They’re also a fantastic addition to any trail mix – they add that perfect chewy texture and sweet apple punch!
Incorporating into Baked Goods
Oh, the possibilities here! Chopped-up dehydrated apple recipes are a dream in baked goods. I love adding them to my muffin batter for little bursts of apple goodness in every bite. They also work wonders in cookies, scones, and even bread. They rehydrate a bit in the batter, giving your baked treats a lovely moistness and concentrated apple flavor. You can even rehydrate them in a little warm water or juice before adding them to pies or crisps for an extra tender texture. For more baking inspiration, check out these tips on making boxed cake mix better.
Savory Applications
Don’t knock it till you try it! While they’re sweet, dehydrated apples can add a really interesting counterpoint to savory dishes. Think about adding them to a stuffing for chicken or pork, or even tossing some into a hearty lentil soup for a subtle sweetness. They can also be a surprising addition to a cheese board, pairing wonderfully with sharp cheddars or creamy bries. It’s an unexpected twist that your guests will love!
Frequently Asked Questions About Dehydrated Apples
Got questions about making your own dehydrated apples? I totally get it! It’s always good to have a little extra info. Here are some of the things people ask me most often.
What are the best apples for drying dehydrated apples?
Like I mentioned before, firm apples are your best bet! Fuji, Gala, Honeycrisp, and even Jonagold are fantastic choices. They have a good balance of sweetness and tartness and hold their shape really well. Avoid super soft or mealy apples, as they just don’t dehydrate as nicely. You want apples that have a good snap when you bite into them fresh!
How long do dehydrated apples last?
When you store them properly in airtight containers in a cool, dark place, your homemade dehydrated apples can last for several months – sometimes even up to a year! The key is making sure they are completely dry and cool before storing them, and that your container is truly airtight. Check them periodically; if they start to get sticky or smell off, it’s time to let them go.
Can I make dehydrated apples without a dehydrator?
Yes, you absolutely can! It takes a bit more patience, but you can use your oven. Spread your apple slices on a baking sheet lined with parchment paper (don’t let them overlap!). Set your oven to the lowest possible temperature, usually around 170°F (75°C) or even lower if your oven goes down that far. Prop the oven door open just a crack with a wooden spoon to let moisture escape. This will take longer, probably 8-12 hours, and you’ll need to flip them occasionally. It’s a great alternative if you don’t have a dehydrator! You can find more information on food safety temperatures to ensure your oven is at the correct setting.
How do I know when my dehydrated apples are done?
The best way to tell is the “leathery” test. They should be pliable and bendable without snapping. They won’t be crispy like potato chips unless you dry them for much longer or at a different temperature. Let a slice cool for a minute after taking it out of the dehydrator; it will firm up slightly. If it bends easily without breaking, they’re perfect for snacking. If it snaps, they’re overdone. If they’re still soft and moist, they need more time!
Nutritional Snapshot of Your Homemade Dehydrated Apples
Just a little heads-up about the nutrition info for your amazing dehydrated apples! Since we’re using fresh fruit and no added sugars or preservatives (unless you count that tiny bit of lemon juice!), these are pretty much pure apple goodness. Keep in mind that the exact nutritional values can vary a bit depending on the size and type of apples you use. Think of these numbers as a general guide – they’re a fantastic, naturally sweet snack that’s low in fat and sodium!
Share Your Dehydrated Apple Creations!
I absolutely LOVE hearing about your kitchen adventures! Have you made these dehydrated apples? Did you try any fun variations or use them in a recipe I haven’t thought of? Drop a comment below and let me know how they turned out! Seriously, seeing your photos and hearing your stories makes my day. Happy dehydrating, friends!
Print
Amazing Dehydrated Apples: 1 Simple Prep
- Total Time: 6 hours 20 minutes - 10 hours 20 minutes
- Yield: Varies based on apple size
- Diet: Vegetarian
Description
Learn how to make delicious and healthy dehydrated apples at home. These versatile dried apple slices are perfect for snacks, baking, and more.
Ingredients
- 6–8 medium apples (such as Fuji, Gala, or Honeycrisp)
- 1 teaspoon lemon juice (optional, to prevent browning)
Instructions
- Wash and core the apples.
- Slice the apples thinly and uniformly, about 1/8 to 1/4 inch thick.
- If using, toss the apple slices with lemon juice in a bowl to prevent browning.
- Arrange the apple slices in a single layer on your dehydrator trays, ensuring they do not overlap.
- Dehydrate at 135°F (57°C) for 6-10 hours, or until the slices are leathery and pliable but not brittle.
- Check for doneness by letting a slice cool; it should be leathery. If it’s crispy, it’s overdone.
- Allow the dehydrated apples to cool completely on the trays.
- Store in airtight containers at room temperature.
Notes
- Choose firm, ripe apples for the best results.
- Thicker slices will take longer to dehydrate.
- Proper storage is key to maintaining freshness.
- Prep Time: 20 minutes
- Cook Time: 6-10 hours
- Category: Snacks, Preserves
- Method: Dehydrating
- Cuisine: General
Nutrition
- Serving Size: 1/4 cup
- Calories: Approximately 70
- Sugar: Approximately 15g
- Sodium: Approximately 0mg
- Fat: Approximately 0g
- Saturated Fat: 0g
- Unsaturated Fat: 0g
- Trans Fat: 0g
- Carbohydrates: Approximately 18g
- Fiber: Approximately 3g
- Protein: Approximately 0g
- Cholesterol: 0mg
Keywords: dehydrated apples, how to dehydrate apples, dehydrated apple recipes, healthy apple snacks, DIY dried apples, fruit dehydrator apples, apple chips homemade, preserving apples naturally, easy dehydrated fruit snacks, apple snack ideas, best apples for drying, dried apple slices, homemade apple chips, fruit preservation